- Published on
Improve Construction Quality: Comparing Design Models with Point Cloud & LiDAR
- Authors

- Name
- Jane Sison
- about
Reality capture tools like LiDAR and photogrammetry have transformed how we verify construction accuracy. But having a point cloud is only half the equation—what matters is how you use it to improve quality. One of the most effective ways is by comparing the scan against the design BIM model to generate a deviation report.
These reports visually and numerically highlight where construction deviates from design, enabling early detection of issues before they become expensive to fix.
What Is a Deviation Report?
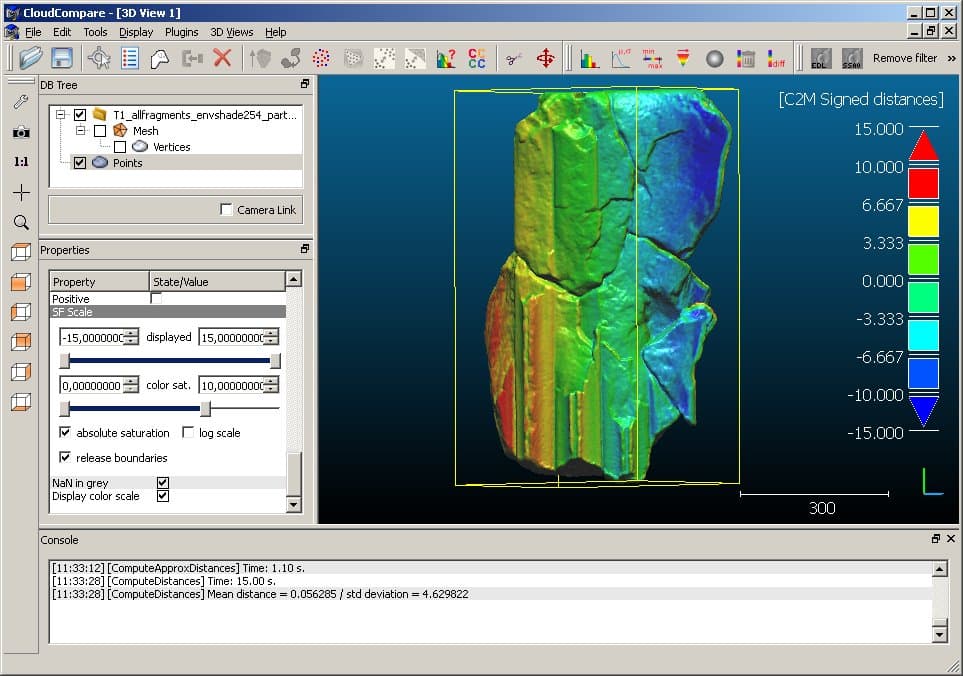 A Heatmeap demonstrates the deviation of the design model with point cloud
A deviation report quantifies the difference between the scanned as-built geometry and the original design model. It's especially useful in the following scenarios:
- Verifying precast or modular component installation
- Checking structural tolerances (e.g. floor flatness, wall plumbness)
- Identifying rebar or pipe misalignments before concrete pour
- Detecting clashes that weren’t present in coordination but emerged during construction
The use of a heatmap allows you to visualize these differences easily, with color coding indicating how far off the construction is from the design intent. For large projects, it allows teams to narrow down their focus on areas that need immediate attention, instead of navigating through a endless amount of point data.
How to Generate a Deviation Report
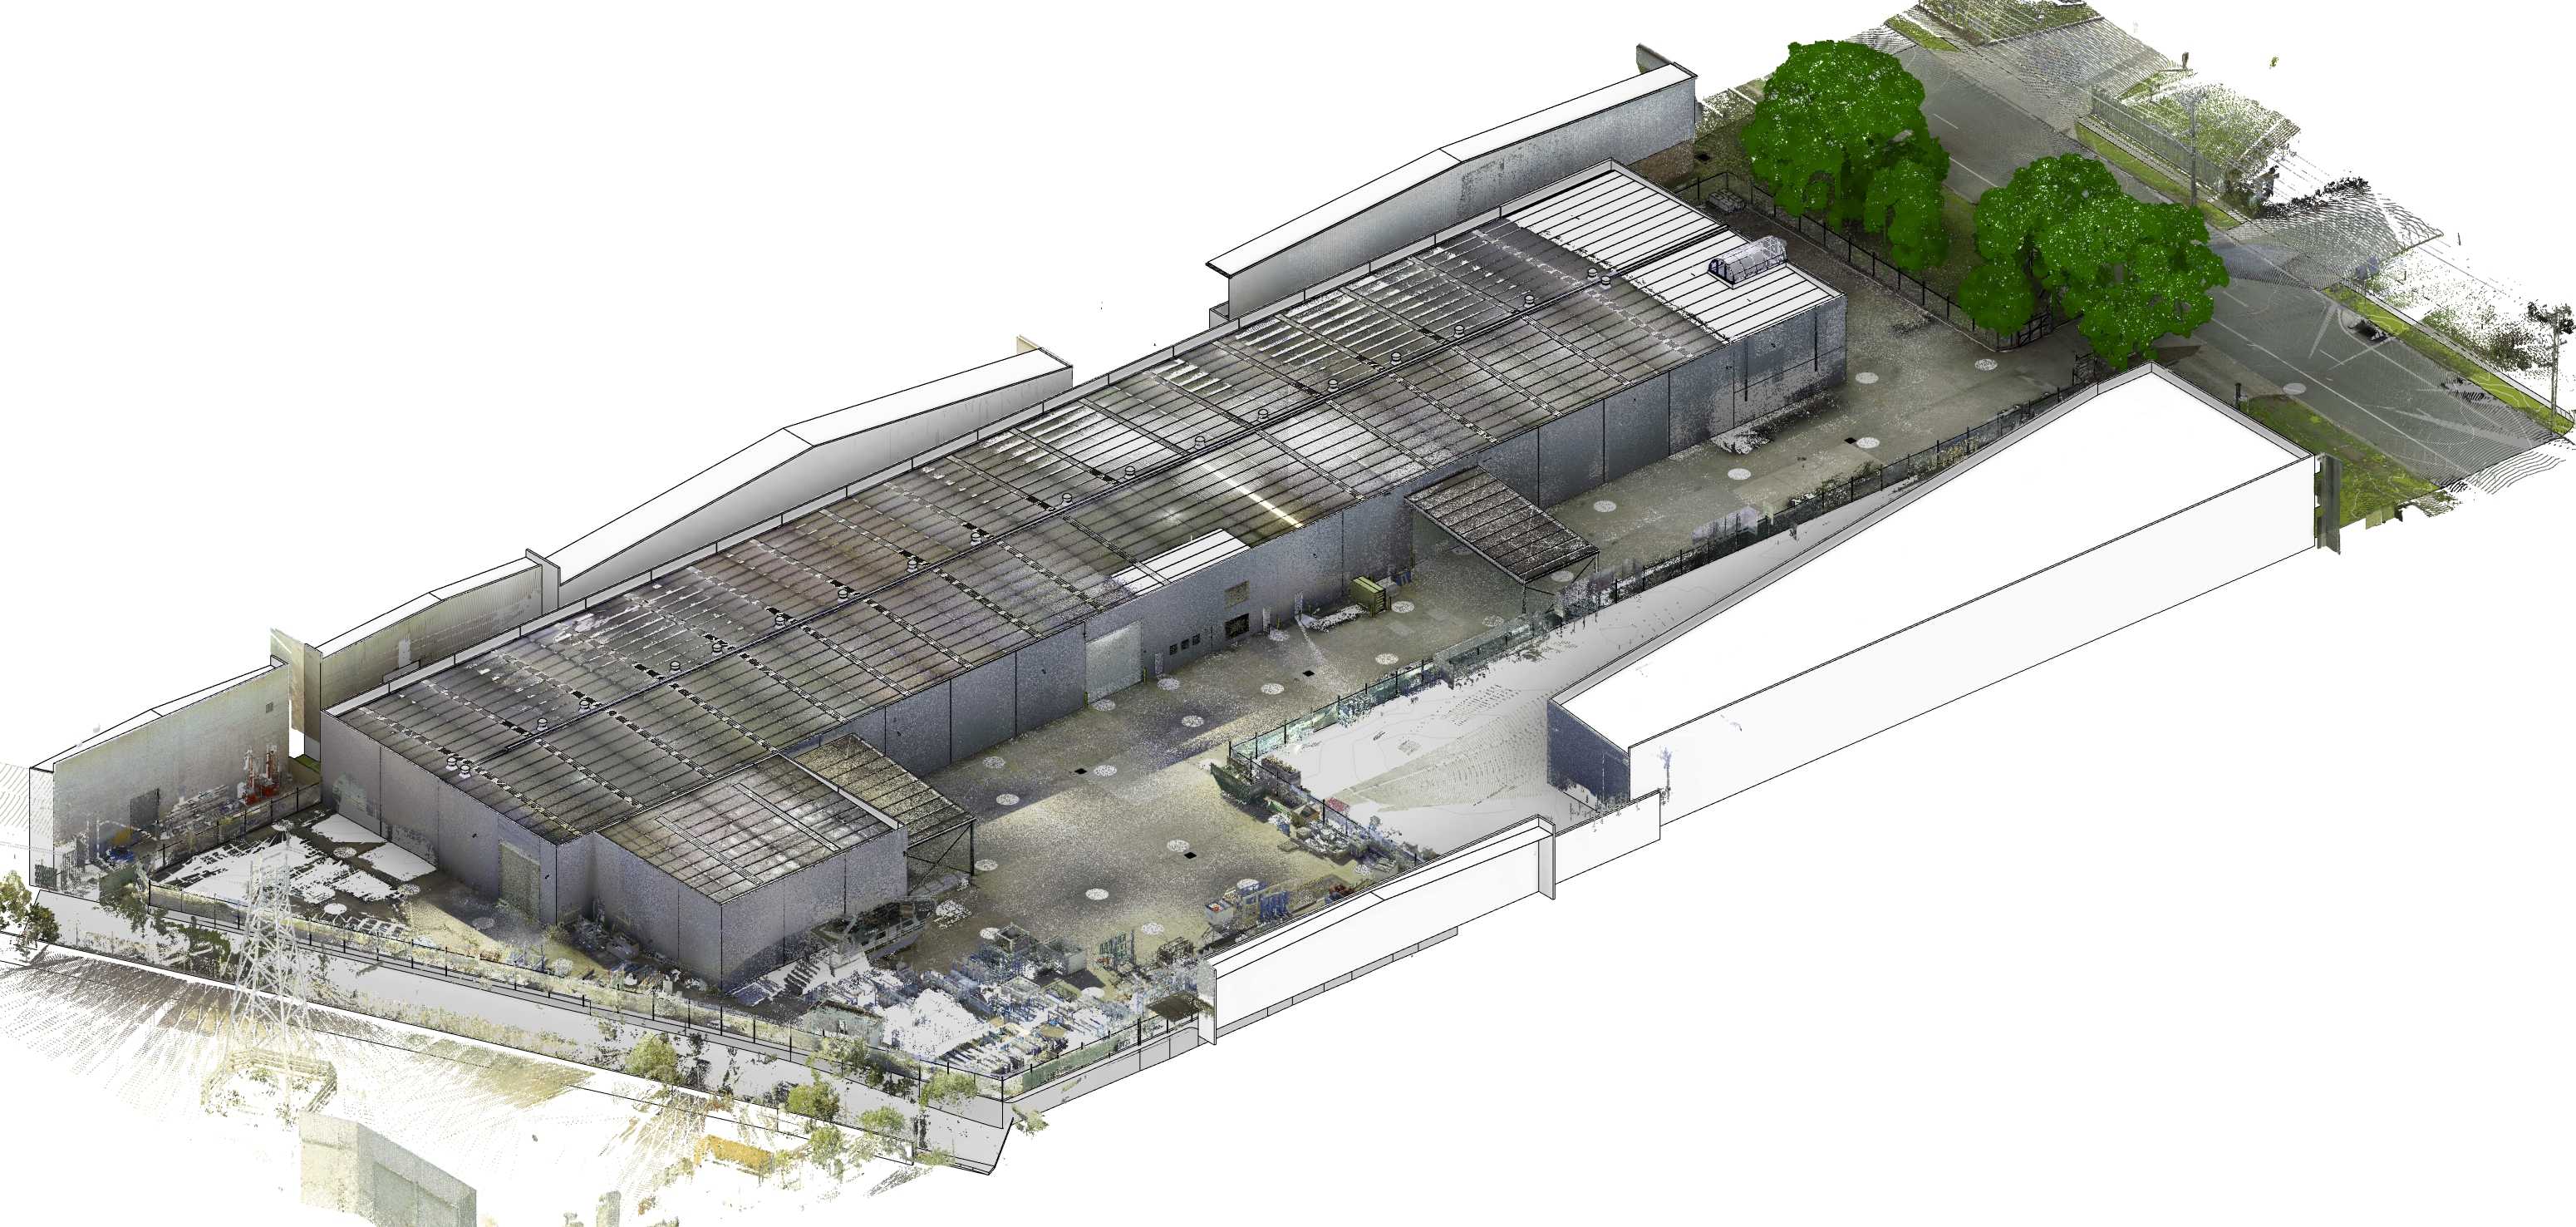 A sample site scan showing a point cloud ready for comparison
Scan the site
Use LiDAR or drone photogrammetry to generate a dense point cloud of the built environment.Pre-process the scan
Clean up noise, align scan data, and register it into a common coordinate system.Import the BIM model
Bring in the IFC or native BIM model into the same environment as your scan.Perform deviation analysis
Software tools measure the distance between the point cloud and model surfaces, color-coding deviations based on your defined tolerance range.Generate report
The result is a visual map and tabulated data showing exactly where deviations exceed tolerance—and by how much.
Tools You Can Use
| Tool | Strengths |
|---|---|
| CloudCompare | Open-source and flexible for custom deviation workflows |
| Verity (ClearEdge) | Built for contractors to check installed work against the model |
| Trimble RealWorks | Ideal for survey-grade accuracy and large infrastructure projects |
| Navisworks + plugins | Useful if you're already working in the Autodesk ecosystem |
| ReCap Pro | Suitable for light comparison tasks and integrated with Revit workflows |
Setting Tolerances - What’s Acceptable?
While there is no one-size-fits-all answer, setting appropriate tolerances is crucial for effective deviation reporting. Tolerances should reflect the specific requirements of each trade and the criticality of the installation.
Some common guidelines include:
- Structural steel: ±5–10mm
- Concrete slabs: ±10–15mm
- Architectural finishes: ±5mm
- MEP installations: ±10–20mm (depending on discipline)
By specifying a reasonable tolerance level between the different trades, you can focus on the most critical deviations that could impact the overall project quality.
Why It Matters
Generating deviation reports isn’t just about catching errors—it's about creating a culture of accountability and precision. Owners and consultants can make more confident approvals. Contractors reduce costly rework. Everyone benefits from fewer surprises and better documentation.
When done consistently, it also feeds into the digital twin, giving asset owners an accurate representation of what was truly built—not just what was designed.
Looking to implement deviation checks in your construction workflow? Our team helps project teams integrate BIM and point cloud comparison tools efficiently. Talk to us to get started.